How to Separate Artwork in Adobe Illustrator

If you have a Wasatch Postscript printer, it's easy, but for everyone else...

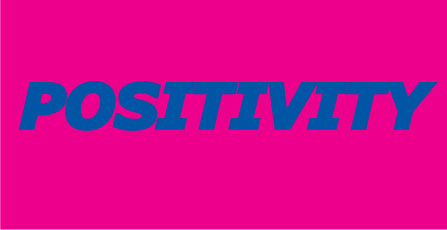
rather badly designed artwork two spot colours

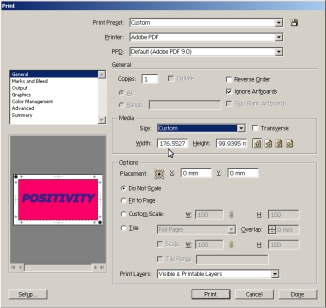
Most established screen shops will generally have a RIP-based workflow for separating artwork and printing positives. A lot of newbies, without the software, have been struggling with the process. This is a How-To for dummies. You will need a copy of Adobe Illustrator (though the priciple is common to CorelDraw and Open-Source software) and a pdf printer. I've used Adobe Acrobat (not the reader) but you can use free utilities like CutePDF and PDFCreator, beware the browser toolbars that these freebies try to install, choose the Custom option and untick the 'please can we hijack your browser?' box. Take my new logo idea (which might need some more work ) It's two spot colours which I need to separate. This will work with CMYK (no halftones - you need Ghostscript) or any number of spots.
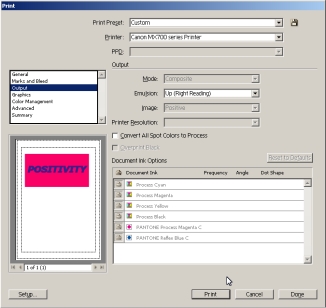
Illustrator print dialog box 1
I've set the blue outline to overprint to make printing a bit easier. That means that there will be a slight overlap with the pink sitting under the outline of the text. Let's try to print that: If I choose a non-postscript printer the Separations drop-down remains greyed-out.
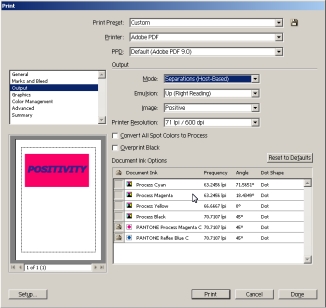
Illustrator print dialog box 2

If I choose a Postscript printer then I have the option to use Separations (Host-based). The trick is that pdf = postscript.

Illustrator Print Dialog 3
I can then add registration marks.
Choose a page size and press print.

This is a pdf which has been produced by this method, note the lettering will slightly overlap the pink.

Simple and elegant.

Next - Vectorising